Yes, it’s March 2022 and I’m still baking sourdough bread. Jump to Recipe
n

Like the rest of the country, I caught a wild starter two years ago. Since then I have been baking bread nearly every week that it hasn’t been too hot to turn the oven on. Now that the starter is mature, it really doesn’t take that much effort to have delicious bread. I just need a day to hang around the house, and enough room in the fridge for the bannetons to rest.
nn
The internet is saturated with sourdough recipes and technique, but I wanted to start my blog here anyway. It is important to pause and recognize the great losses and stress that we have all suffered- lives lost, routines disrupted, financial and emotional wreckage left in the wake of this generational disaster. May we all find comfort as warm and nourishing as a loaf of fresh bread.
n
Basic Sourdough Bread: Pain de Campagne
This is a very basic guide, more of a “here’s how I handle it” than a roadmap for beginners. If you are looking for more in-depth information, try Flour, Water, Salt, Yeast by Ken Forkish or Sourdough, by Sarah Owens.
Before we get to ingredients, let’s talk about tools.
n
If you want to be successful with your baking projects, not just sourdough, you’re going to need a reasonably accurate scale that can handle a range of weights from heavy as a batch of bread dough to single grams of salt.
nn

Here’s mine. It’s an Escali, and I don’t love it but it does the job.
nn
Next, you’re going to need a cast iron dutch oven. I would not recommend using a fancy enamel one for this, because you have to get it very hot and dry, and that makes me nervous. I happen to use one because I have a Le Creuset that developed a flaw through normal, responsible use. The company replaced it but didn’t want it back. Before that, I baked loaves one at a time with the Lodge cast iron and it worked great.
nn
Beyond that, you need a medium sized bowl that fits on the scale, a big bowl for the dough, and two smaller bowls or bannetons for resting the shaped boules in the fridge.
nnn
Ingredients
- n
- 360g of 1:1:1 prepared sourdough starter
- 720g Bread Flour (I have good luck with Bob’s Red Mill Artisan Bread Flour)
- 100g Whole Wheat Flour
- 600g room temp water
- 20g kosher or sea salt
n
n
n
n
n
First Step: The Starter
n
I’ve been feeding and caring for my starter for 2 years now. My routine goes something like this:
- n
- Pull the jar from the fridge, and scrape it into a bowl on the scale (tare it first!) to see how much there is.
- Do some math: I’m making 1 recipe of bread so I need 360g, plus some to save. I always aim to save about 100-200g. Let’s say 520g today.
- In an ideal world there would be 175g of starter in the jar, to which I would add 175g water and 175g bread flour. Most of the time the stars do not align, and the math goes something like this: 120g in the jar. Crap. OK, 520g – 120g = 400g. 400g/2 = 200g each of flour and water.
- Mix starter and water in the bowl until it is pretty well dissolved, and then mix in the flour.
n
n
n
n

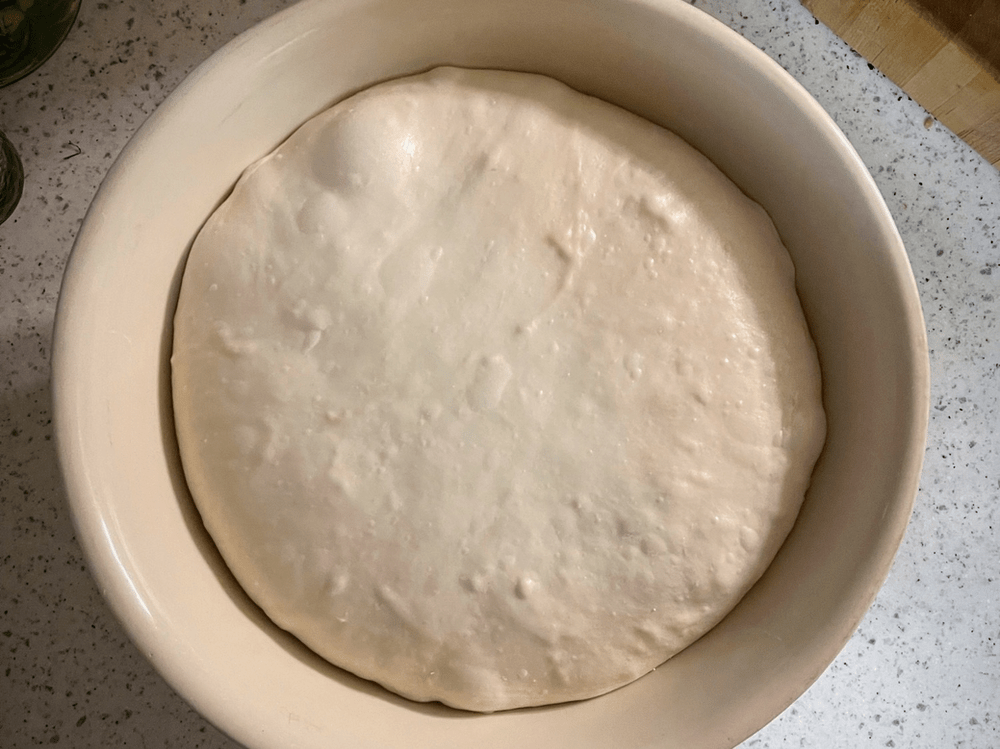
Let it hang out until it looks like this:

It takes a couple of hours.
nn
Next Step: Autolyse
n
Autolysing hydrates the flour and activates the gluten in the flour. We’re going to follow a similar process, basically feeding the starter more flour and water. NO SALT YET!
- n
- Place an empty medium-sized bowl on the scale and tare it, and then add your 600g room temperature water.
- Tare the scale, and weigh in 360g of your starter. Put the rest of the starter into a clean jar and pop it in the fridge for next time.
- Mix the starter and water together until it is pretty well dissolved. It will be stringy and weird from the gluten protein strands, enjoy it like a toddler would- use your hands.
- Tare the scale again and weigh in your 100g whole wheat flour and 720g bread flour. Mix it all together lightly until the water is soaked up. You aren’t kneading or working the dough at this point, just folding it together to make wet flour.
- Cover the bowl with plastic wrap and set aside.
- Before you move on: in a separate bowl, weigh out 20g of kosher or sea salt. If you are having trouble getting an accurate measurement (this is why I don’t love the Escali), a little bit under will give you airier bread, a little bit over will be denser. 19-21g is a fine range.
- Set your timer for 2 hours. 1.5 is fine if that works better with your day.
n
n
n
n
n
n
n

Wet flour ready to autolyze. Go find something to do for 2 hours.
n
Mixing the Dough- Stretch and Fold (3 times)
n
Clean off a section of counter and make sure it doesn’t have any residual cleaning product on it. Take a clean, damp rag and make a wet section. Normal bread recipes would say to dust the counter with flour, but you do not want to do this. Wet it.
- n
- MIX IN THE SALT (I put this in bold, because it is really easy to forget.) Sprinkle your salt across the top of the dough, then get your hands wet. Just like the counter, wet is the key to minimizing stickiness. Turn out the dough and salt onto the damp counter.
- Use a pincer motion with your hands to work the salt through the dough. Once it is mixed in, you can begin to pick it up and slam it down on the counter with a satisfying whack. When you pick it up, it will stretch out long. Whack it down and fold it over itself. It only takes a few whacks, so make them count.
- When the dough feels a little bit tighter, fold it into a ball and pop it back in the bowl. Set the timer for 30 min. (that’s 1)
- When the timer goes off, wet the counter, wet your hands, and turn the dough out of the bowl. Pick up an edge, and see it stretch out. It will be kind of wet and sticky, which is ok. Fold it over on itself, rotate it 1/4, and repeat. After 3-4 folds it will feel tighter again, and the surface may threaten to tear. Stop there, pat and tuck it into a ball, and pop it back in the bowl. Set the timer for 30 min (that’s 2)
- Do step 4 again, set the timer for 30 min (that’s 3)
- Do step 4 again. The texture will have changed. It will have some air bubbles in it. Be careful not to rip or tear through the dough, you’re trying to get that gluten to stretch and get springy. This time, rather than pulling the dough out long, it’s going to look more like lifting up its belly and tucking the ends under itself. As the surface tension increases, form a ball by cupping the dough in your hands and scooping to the center of the underside while rotating it 1/4 turn. I always think of picking up babies. Supportive and snug, strong but not rough.
- When your dough baby is a nice, snug ball, put it into the clean Big Bowl, wrap it with plastic wrap, and let it rise.
n
n
n
n
n
n
n
n
See the big bubbles?
n
Cold Fermentation: Shape Dough and Chill
n
Once the dough has roughly doubled in size, it is time to form the loaves and tuck them into their little baskets (or bowls) in the fridge. Choosing your moment will take some trial and error. Depending on the age of your starter, temperature of your room, and even the amount of time that the starter spent fermenting when you were building up your 360g can all impact the texture of the dough. If you leave it too long, it gets stickier and sticker as enzymes dissolve the gluten proteins. You will want to catch it and chill it before that happens. Some loaves will be better than others. You will gain an instinct for it as you try. Even mediocre bread is usually delicious. Yes, this is a pep talk.
nn

Flour your bannetons with bread flour or rice flour if you have it. If you are using bowls, 8″-9″ works well. You can line them with a floured cloth.
nn
- n
- Clean and dampen your counter and hands, and turn the dough out.
- Cut it in half with one cut, and then gently bundle the two halves into little balls. Let them rest 10 min.
- Tuck and roll them up into tight little balls, and plop them gently into the bannetons. Develop surface tension without tearing. I used to try to put them seam-side up, but these days I’m putting them in seams down.
- Dust them lightly with flour, cover with a napkin or tea towel, and then with a plastic bag. Shower caps would be perfect.
- Refrigerate for 12-36 hours.
n
n
n
n
n
Smart bakers take their watch and ring off before shaping the dough…
Baking the Bread
n
Arrange your dutch oven (s) in the middle of your oven, lids on, and set the oven to preheat to 500 degrees. Once it is hot:
nn

n
n
- n
- Cut a piece of parchment in a circle. Butter the parchment, and lay it butter-side down over the top of a banneton.
- Use a pizza peel (or cutting board, or cookie sheet) and flip it over.
- Gently remove the banneton.
- Score a line or two about 1/2″ deep on the loaf. There are lots of ways to get creative with this. I’m not usually that creative.
- Pull the dutch oven out of the oven CAREFULLY and remove the lid.
- Lift the loaf with the parchment and stick it in the dutch oven. Put the lid back on, and stick it back in the oven.
- Reduce the oven temp to 450, and set a timer for 30 minutes.
n
n
n
n
n
n
n

It is so, so hot. Please remember to protect your hands.
nnn
Once the timer beeps, open the oven up and remove the lids. Bake for another 20 minutes or so until you achieve your desired crust color. You can take the bread out of the dutch oven and lay it on the oven rack if the bottom is getting dark before the top.
nn
If you are baking one at a time, put the dutch oven back in, lid and all, and turn it back up to 500 to preheat again.
nn
Allow your bread to cool on a wire rack for at least an hour. If you can let it cool all the way, you will be happiest with the result.
nnnn
Please join our mailing list for regular but not exhausting email updates, and follow us on twitter, facebook, and pinterest. See Below!
nnnn